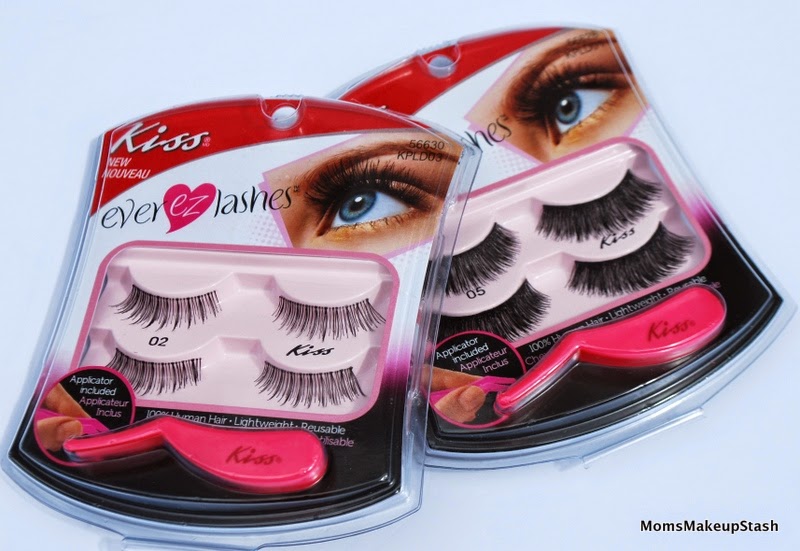
I just recently tried out the Kiss Ever EZ Lashes and in one word….they are wonderful. I have to admit, I do not wear lashes too often, nor have I tried out a ton of brands to compare these too, but I was quite impressed with the look of these on as well as their quality & durability. They are made from 100% human hair and have a thin lash band, which makes them look and feel more natural. In addition to these being reusable and easy to apply, they also come with either a transparent (natural looking) or black (glamorous) band. There are also a number of different styles available. See below for photos and tips on how to apply false lashes.
*Kiss Ever EZ Lash Double Pack in Styles KPLD02 #02 & KPLD01 #05 (shown above) – $6.47 CAD * comes with 2 pairs of lashes & an applicator
 |
| Kiss Ever EZ Lashes Multi Pack in Styles KPLM02 #11 & KPLM01 #03 – $12.94 CAD *comes with 5 pairs of lashes & an applicator |
Tips for Applying False Lashes
To apply false lashes like a pro, follow the fool-proof steps below. For reference and in case these sound familiar, these are actually the exact steps I recommended back in 2013 as part of Fashion Magazine’s Beauty Panel here.
Step 1: Check Fit:
Gently peel the lashes off of the tray using your fingers or a pair of tweezers. Be careful not to damage the band. Lashes come in all sorts of sizes, so to ensure proper fit and get an idea of placement, lay the lash on top of your natural lash. If it extends longer than your eyelid, you may need to trim off any excess from the sides.
Step 2: Apply Adhesive to the Lash Strip
There are a number of ways that you can do this. Some like to squeeze a line of adhesive directly onto the lash strip. Others like to apply the adhesive to a cotton swab or toothpick and glide it across the lash strip. I prefer to apply a bit of the adhesive to the back of my non-dominant hand and working quickly, gently run the outer seam of the strip along the glue until the entire strip has a thin layer of adhesive on it. I then go back and apply a bit more adhesive to both ends.
Step 3: Wait
This step is where many people make a critical mistake. It is so important that you allow the glue to “get tacky”, so make sure you wait 45 seconds or so before applying your lashes. While I wait for the glue to set, I like holding the lash strip in a slightly bent position. (i.e. U shape) This helps keep both of the ends from coming up on either side when the lashes are applied and makes the strip less stiff to work with, helping it mold better to a curved eye.
Step 4: Apply and Secure Lash Strip in Place
Tilting my head back slightly, I place the lash as close to my natural lash line as possible, making sure that they are lined up with the start of my natural lashes. Do not place false lashes too close to your tear duct—there should be a space there. I use a pair of tweezers to securely hold onto the lash strip in the centre, close to the band but not touching the glue. I find that tweezers provide more precision as opposed to using my fingers. I lay down the end first, then the middle and lastly the front. I then gently press along the lash band to secure it all in place. While the glue is still tacky, you can make any adjustments quickly if necessary.
Step 5: Let Dry and Touch Up Liner/Mascara
Once you’ve placed both lash strips, wait patiently for 1-2 minutes while the adhesive dries completely. I usually go back and touch up my eye liner at this point. I use liquid or gel liner to help conceal any visible seams and fill in any gaps. I then apply my mascara to mesh my lashes and the falsies together.
Do you have any tips on applying false lashes?
Have you ever tried the EZ Lashes by Kiss?


Stay Connected!